
My bike has reached 1,137km and I haven’t done any servicing yet. I have decided to DIY it since I think it can help me learn a lot about the bike and since I’m doing it myself, I know the service is being done with good care.
This is the step on how to change the oil and oil filter for 135LC ES 5-speed, after the jump  1. Look for the drain plug under the engine. The size is 19mm.
 2. Make sure you are using closed-type 19mm wrench to do the job. If you use, open-end wrench, you just might destroy the drain plug. Remember to put a container under the engine for the engine oil to flow out.
 3. The drain plug is connected to a filter with spring that will eject the drain plug straight to the container. Clean up this filter by using a fresh engine oil if there is some debris attached to it.
 4. Let the juice flow!
 5. Next up is to remove the oil filter. Remove the 3 nut attached to the oil filter cover. The size is 8mm. Again, make sure you are using close-type wrench.
 6. The good thing about DIY this is that you know you won’t be tricked by mechanic to change this nut to a non-original type.
 7. That is how you are going to hold the oil filter cover to remove it. Remove it slowly as it might drops to the floor and get scratched. I’m sure you don’t want that to happen.
 8. The oil filter can be inserted in one direction only, so, there will be no problem for you to fit it in again. Replace with new oil filter.
 9. No description needed
 10. Put back the oil filter cover on and carefully screw it tightly so that there won’t be any oil leaking from the oil filter cover after the engine is running.
 11. Put back the drain plug on. Observe the filter spring assembly. The rubber is on the top side.
 12. Screw it in tightly
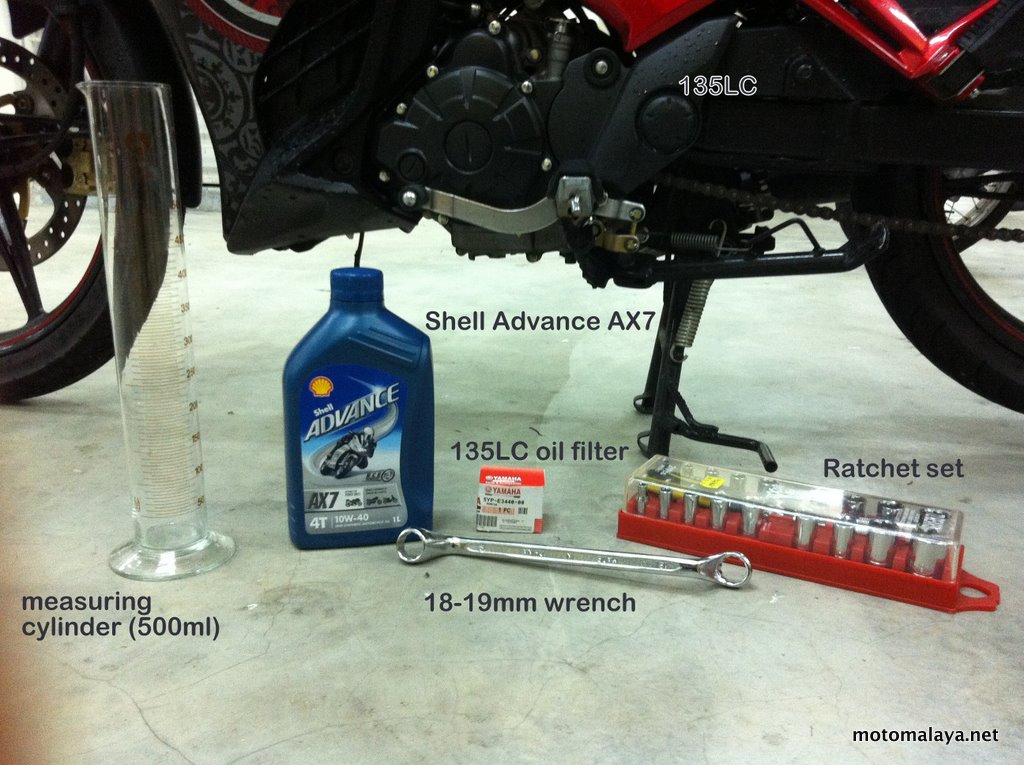
 13. After the drain plug has been put on, then you can start pouring the fresh engine oil. Here I’m using Shell Advance AX7 10W-40 API SL Semi Synthetic. I’m only pour 900ml of the engine oil. The technical specification stated that it needs
 1,100ml 1,000ml of engine oil with oil filter replaced (or 940ml only without filter change, thanks to Hasrul Hafiezan). I do this to make my engine feels lighter. DON’T TRY THIS TO YOUR BIKE if you are not sure what is the risk it might cause you. Anyway, I just might put the extra volume tomorrow.
 14. I also adds 50ml of X1R Small Engine Formula to my bike. The bike starts easier and it revs very easy. I’m going to try more of my bike tomorrow. I’ll update about the performance whether it is good or not. My engine oil is now at 900ml + 50ml = 950ml.
 15. Odometer reads 1,137km. An 137km late to service.
I hope the post here helps to give you info and inspire you to do your servicing by yourself.
Thanks to Mr. Thanawi for his big help in this service work. He is the one who mostly do the work here.


‘Closed-type’ – actual term is RING spanner/wrench. 18-19mm is refer as combined ring spanner. Always use the correct tool to service your bike
hi motomalaya. nice posting so far 🙂
i wonder how to buy a malaysia original footrest of yamaha 135LC. i’m in indonesia. and the one they build here is s*ck. anyone can help? and how much is it? googled anywhere but find nothing.
Bro..wanna ask you about the exact 4t oil that can be use for LC…and the brake fluid oil..
bro,nak tanya.gasket dekat drain plug tu senang tercabut x?kalau hilang keluar x minyak hitam?
Hi, may I know where to get a bottle of X1R Small Engine Formula in KL area?as well as what is the price for one bottle yea? Thx for your reply!!
klo letak 950ml minyak enjin dengan 50 ml xr1 ok tak?
Dear All my friends,
i just want make some correction on statement for pictures no.5 & 6. it supposed to be called bolts or fasteners instead of nut..
let shared with others.
Many thanks
a330crew
Ok2. Tq!
Eddy, how is the X1R small engine formula perform?
My bike now easy to accelerate and achieve 100km/h in short time. Gonna test more and update it on the blog.
Hey Eddy, nice write up. Very precise way to measure your oil. But whats the molar concentration of X1R formula? 😀
Sir, just wanna ask, where did u throw the old engine oil? or did y do this at any workshop? if i’m doing it at my house, where should i throw the used oil? surely not into the drainage system, it’ll poison the drainage system.
Put it back into the empty bottle and send it to workshop near you.